This help section will be expanded with additional information. Have a question you don’t see answered? Email webmaster@mcomd.org.
Logging In
- Go to the Member Login page by clicking Login in the top right corner.
- Enter your username and password.
If you are using the new website for the first time, your username will be the same as on the previous website. You must reset your password using the FORGOT PASSWORD link.
Membership Info
- Click Account to view your profile, membership, and payments.
- Under Subscriptions, you can view your current membership status and expiration date.
- The Payments area shows all previous transactions.
Forgot Password
If you forget your password, you may go to the FORGOT PASSWORD page. This page is also accessible from the Member Login page. Enter your email address or username to have a reset password link emailed to you.
Directory Information
On your Account page, you will see two sets of contact information. The first set of contact information is only for site administrators and record-keeping purposes.
The second set of information, the Member Directory section, will be visible in the Member Directory to MCOMD members with an active membership.
Viewing the Schedule
- From the Hike Schedule page, you have 2 options to view: LIST and CALENDAR view.
- You may sort by category or difficulty.
- To see past hikes, you can click the back arrow.
- To see the full details of a hike, click the hike link from the schedule. You must be logged in as a member to view these details.
Printing the Schedule
- To print the schedule, select PRINT in your Browser. In Chrome, this is located in the top right, under the 3 dots. Note – whatever filters you applied to the schedule will now be applied to the printout as well.
- This will open your Browser’s Print Dialog window, where you can change the size/scale of the printout, paper settings, etc.
Registering for a Hike
If a hike allows registration (required or optional) and you wish to register:
- From the hike page, click GOING.
- Enter your email and the number of guests.
- You will receive a confirmation email confirming your registration and the Hike Leader will receive an email indicating a new signup.
Canceling a Registration for a Hike
If you have registered to attend a hike and no longer wish to attend, you can change your RSVP status to NOT GOING.
- Go to the hike’s page by clicking on it from the schedule, or by clicking the hike title in your confirmation email.
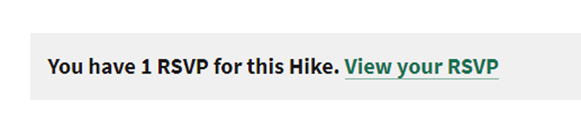
- Once on the hike’s page, if you have previously RSVP’d, you will see a box where you may click the link View your RSVP:
- On your RSVP page, select the dropdown for GOING/NOT GOING, change your status to NOT GOING, and click UPDATE.
- Your registration has now been removed from the count of attendees and the Hike Leader has been notified.
NOTE: Since your RSVP has been changed to NOT GOING, the hike page will still indicate that you have an RSVP for this Hike. You may click the View your RSVP link again to confirm your NOT GOING status if desired.